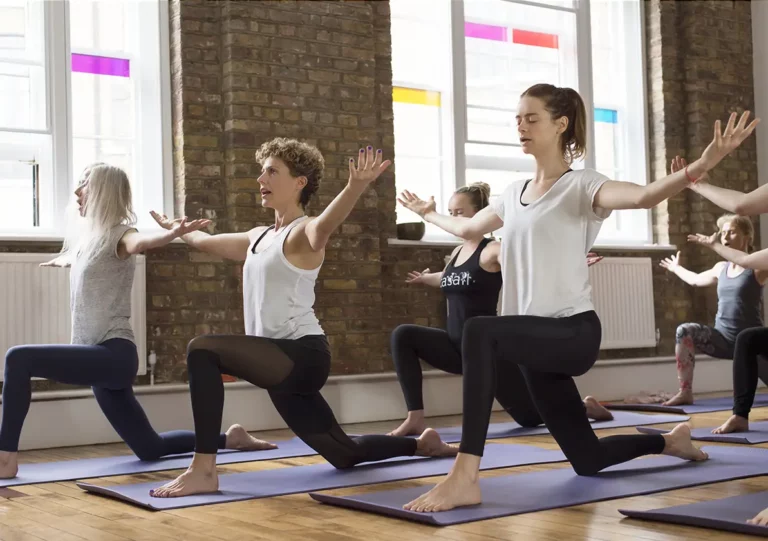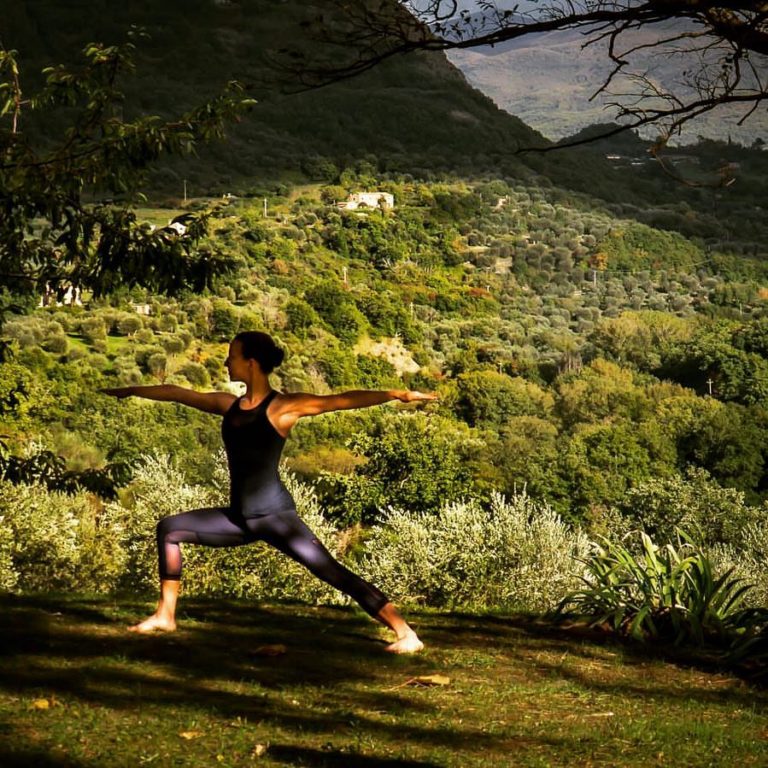
Warrior II is a standing posture that requires a certain degree of muscular strength and flexibility, as well as joint mobility in the pelvis, legs and feet, to create a steady and fundamental support in the lower body, while bringing a sense of ease and freedom to the upper body. Seeing as the lower body serves as the foundation for this posture, it is crucial that we pay attention to the symbiotic relationship between the three major weight-bearing joints involved – i.e., the hip joint (where the thighbone meets the hip socket), the knee joint and the ankle joint.
These three joints work in relation to the pelvis as a whole. Hence, whatever movement you make in the pelvis affects the positioning of your legs and vice versa. The pelvis is also connected to the spine via the sacroiliac joint (where the sacrum meets the two iliac bones that make up part of the pelvis). Therefore, the movement of the pelvis also influences the positioning of the spine. The interdependent relationship between the lower body, pelvis and the upper body needs to be taken into account, in order to approach Warrior II in a safe and constructive way. I invite you to explore this posture from the “inside out,” stay present to the sensations of the body as you perform the actions and see where it takes you. Remember, each body is different and responds differently to each posture. Adapt the posture to suit you, not the other way around.
Placing the body
1) Determining your stance
Decide on a comfortable distance between your legs. If your stance is too short then your front knee will bend over the toes of your front foot, going beyond the 90 degree angle. This can put strain on the tendons of your knee joint and can compress the meniscus (a piece of cartilage that provides cushioning inside the knee joint.) If your stance is too long then it may affect your balance and create an excessive opening across the groin, leaving little freedom for the pelvis to move and the hip joints to rotate.
Question: Should I align my feet heel to heel, heel to arch or hip-width apart?
Answer: These variations depend on the range of movement in your hips and your ability to balance. If you are struggling with balance and feel quite tight around the groin, then keeping your feet wider apart – i.e., with a hip-width distance – can be helpful. If you feel mobile enough then you can explore a narrower stance by exploring the heel-to-heel or heel-to-arch placement of your feet. However, be mindful of the sacroiliac joint, as the more you cross (adduct) your legs, the more pressure you will put on it, on the side of your back leg. Experiment between these three options and see what feels best for you.
2) Determining your hip rotation
A common mistake in Warrior II is to turn your pelvis completely sideways at a 180 degree angle. This movement usually exceeds the actual turnout of your hip joint (unless you actually have a full 180 degree turn out in the hips). If the movement of your pelvis is not in balance with your actual hip rotation then it will pull your legs out of alignment and will most likely create a twist in the knee and ankle joint of your bent front leg. If your pelvis is too open to the side in Warrior II, it will pull on the ligaments of your front hip (iliofemoral ligament and pubofemular ligament), and the muscles of your inner hips and thighs (iliopsoas and the adductors), resulting in your front knee dropping inwards which in turn risks to create a twist in your front knee while collapsing into the arch of your front foot. In order to avoid this, make sure that you move the pelvis, legs and feet symbiotically so that the rotation of the legs is balanced from the hip joint down through to the ankles.
The hip of the back leg will most likely have to turn diagonally forwards a bit, rotating the back leg into an approximately 60 degree angle while getting the sitting bone of the bent front leg to slightly wrap back in underneath itself. This action also allows the hip joint of the front leg to externally rotate, keeping the front knee directed towards the front of the mat, in line with the hip joint. From there, you can work towards bending deeper at the knee and hip joint, bringing the thighbone towards a parallel positioning with the floor. The stronger and more mobile the legs and hips get, the closer the front leg will go towards a 90 degree bend.
Question: Should I tuck the tailbone under in this pose?
Answer: No. The extension of the back leg will tilt the pelvis slightly forward, creating a natural inward curve in the lower back. You can then support and lengthen up through the spine by lifting the pit of the abdomen in and up, thus engaging the deep abdominal muscles. The work of the abdominals will also aid in lifting the frontal hip points up away from the thighbones, preventing any hanging and pinching in the hip crease.
Question: Do I have to stand with the front knee in a 90 degree bend?
Answer: No. If you are new to Warrior II then I suggest moving into the bend gradually while listening to the sensations in your body. Find your own level of intensity and work from there. The deeper the bend, the more strength and mobility is required.
3) Rotating the torso
Once the legs and pelvis are in place, the torso rotates to face the side. The movement can be initiated from the navel upwards (without letting the pelvis follow) and the mobility of your torso will decide how far you can rotate to the side. As you rotate your spine, you rotate around your central axis, striving to keep both sides of your trunk equally long and maintaining a centred midline going from the base of your spine to the crown of your head. When you have reached your maximum rotation, extend your arms out in line with the torso and keep the arms, shoulders and torso in the same line, as if your arms are an extension of your heart, lungs and collarbones. If the neck allows it, then gently spiral the head to look over the front hand. However, if that creates too much tension on the neck, try looking sideways instead.
Question: I find it difficult to breathe when I twist my torso?
Answer: Spinal rotation creates a compression between the vertebrae and also creates a restriction in the movement of the thoracic diaphragm (the main breathing muscle), which is connected to vertebrae T12 and L1 and L2. This restriction is what makes it harder to breathe and thus it is crucial to maintain an extended spine to give space for the lungs and diaphragm to move and the ribcage to expand and release. A suggestion is to move into the twist on the exhalation. When you exhale, the thoracic diaphragm lifts up and the pit of the abdomen naturally draws in. This action also supports the lengthening of your spine. On the inhalation, release the twist gently and allow for the torso to expand upwards, sideways and back. On the exhalation, lengthen the spine and gradually deepen the spinal rotation.
Summary
Allow your hips to rotate slightly diagonally forwards to maintain a natural rotation from the hip joint, while opening and rotating the torso to face sideways. Elongate your arms in line with the shoulders, starting from your back and expanding outwards beyond the fingertips. Steady your feet, which should be apart, in connection with the ground, with lifted arches. Anchor down with the feet to extend up through the spine. The tailbone should be heavy and the crown of the head should transcend upwards. Keep a soft and steady gaze to encourage a softening of the temples, forehead and jaws. Breathe!
References
— The Therapeutic Wisdom of Yoga. Volume Two: Applications. Doug Keller, 2017.
— Yoga for You. Tara Fraser, 2001.
— Yoga Anatomy. Leslie Kaminoff and Amy Matthews, 2012.
— The Key Poses of Yoga. Your Guide to Functional Anatomy in Yoga. Volume Two. Ray Long, 2008.
— Yogabody. Anatomy, Kinesiology and Asana. Judith Hanson Lasater, 2009.
Eleonora teaches Yoga Open on Mondays at 7:15 in Camden, Meditation and Mindfulness on Tuesdays and Thursdays at 12:00-12:30 in Shoreditch, and Yoga Level 1 /2 on Tuesdays and Thursdays at 12:35 – 13:35 in Shoreditch.