
malasana (deep squat)
by Mollie McClelland Morris
To build up to malasana, pull a chair away from a table and then stand on the side of the chair (one hand on the table, one hand on the back of the chair, with the chair seat behind your legs). Practise slowly sitting down, with awareness. Use table and chair for support if your legs can’t control the movement. As your bottom reaches back towards the chair, you might sense the tailbone moving backwards in space and backwards relative to the pubic bone. This is a bit like sliding a tripod open.
Support the squat: Some options, supporting heels (add a rolled-up blanket / blocks under your heels), or the back (lean against a wall). To build up strength in the feet, work with a partner or hold onto something very stable as you lower down. Or sit on something low, a child’s chair, low step, block (or two), keeping your feet flat on the floor.
Full malasana. Squatting positions don’t need to be super exact or done the same every time. A good guideline is heels under shoulders and the angle of your feet around 45 degrees to the side. Eventually, try with your feet parallel. Reach your bum back in space as you lower and go down as far as possible. You can stay here for a few breaths, or a few minutes, depending on your strength, flexibility and goals. Breathe steadily.
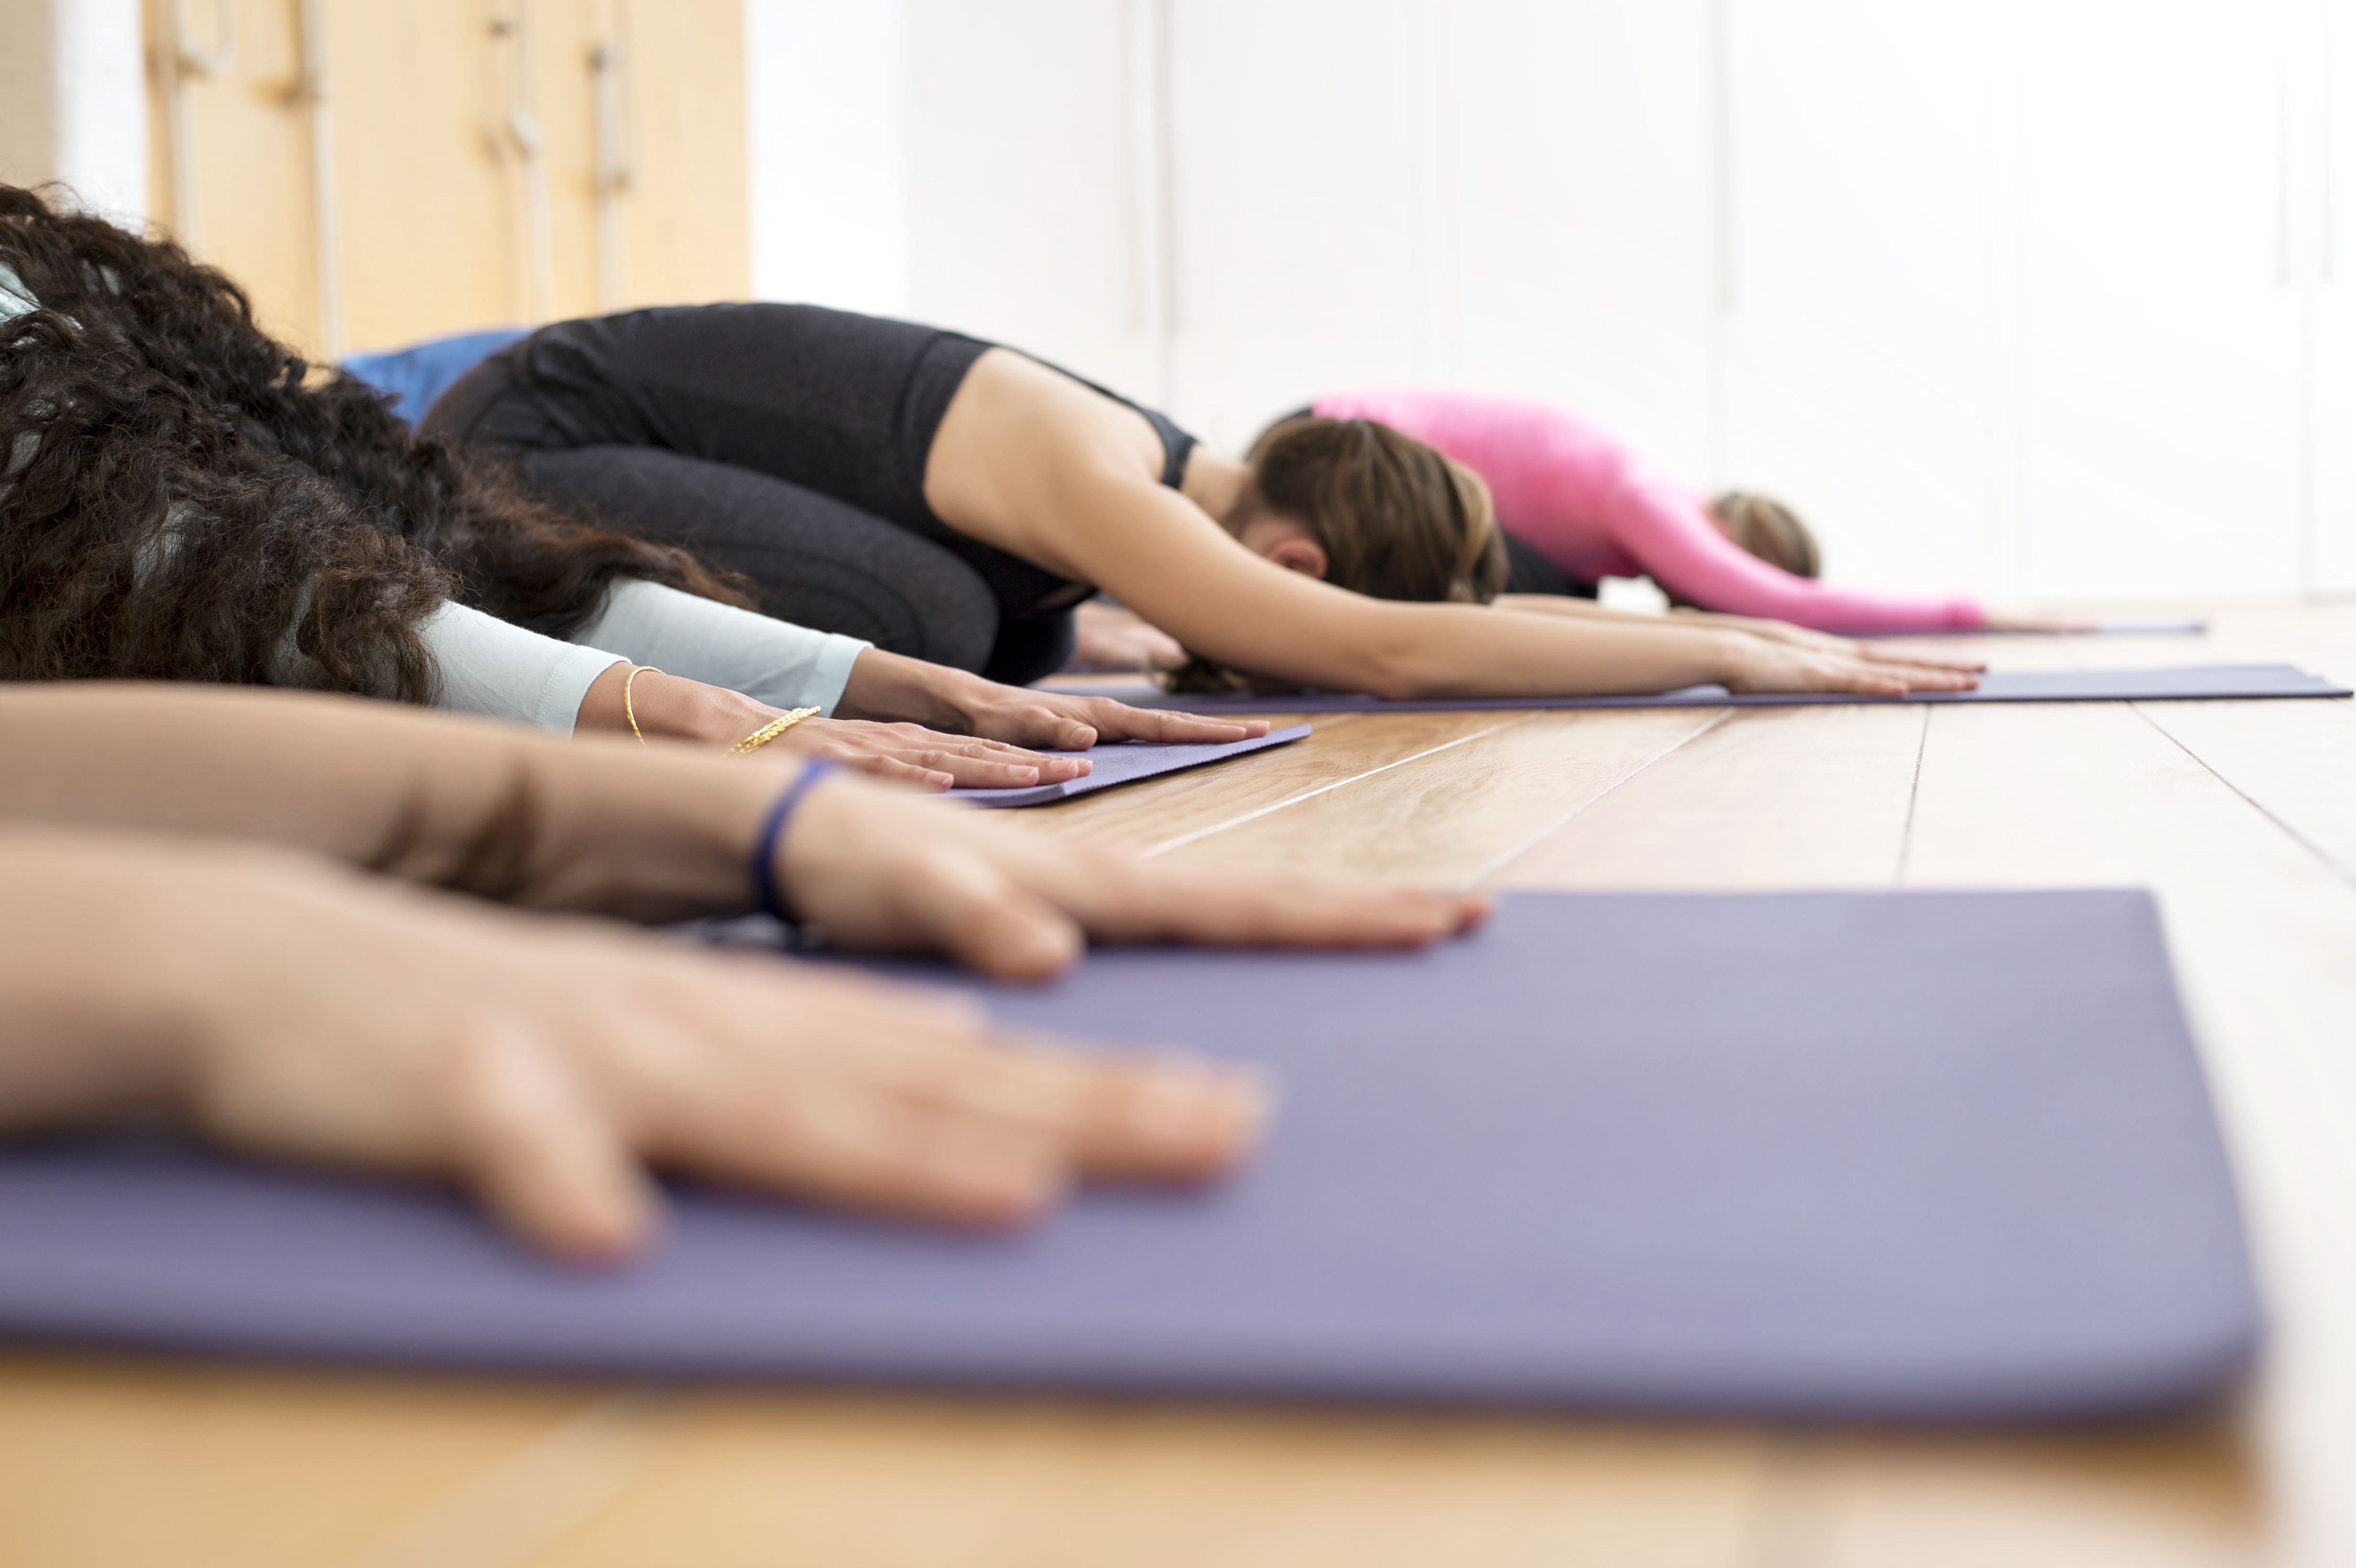
child pose
by Donna Noble
The word balasana comes from the Sanskrit “bala” (meaning “child”) and “asana” (meaning “pose”). There are numerous ways to practice child pose with the use of chairs and other props in order to make it more accessible. When practised with the knees together, the pose can be uncomfortable for practitioners with curvy bodies or limited mobility in the knees and for pregnant women. An alternative is to take the knees wider in order to make more room for bellies and thighs. This modification maintains all the benefits of the pose while creating more space for the body.
The neck should stay in neutral position. If the neck is hovering, use a block, or make two fists with the hands, stacking them on top of each other and rest the forehead. The position of the hands can be extended with the palms on the mat to help the buttocks to works towards the heels or, alternatively, beside the body with the palms facing up, making it slightly more restorative.
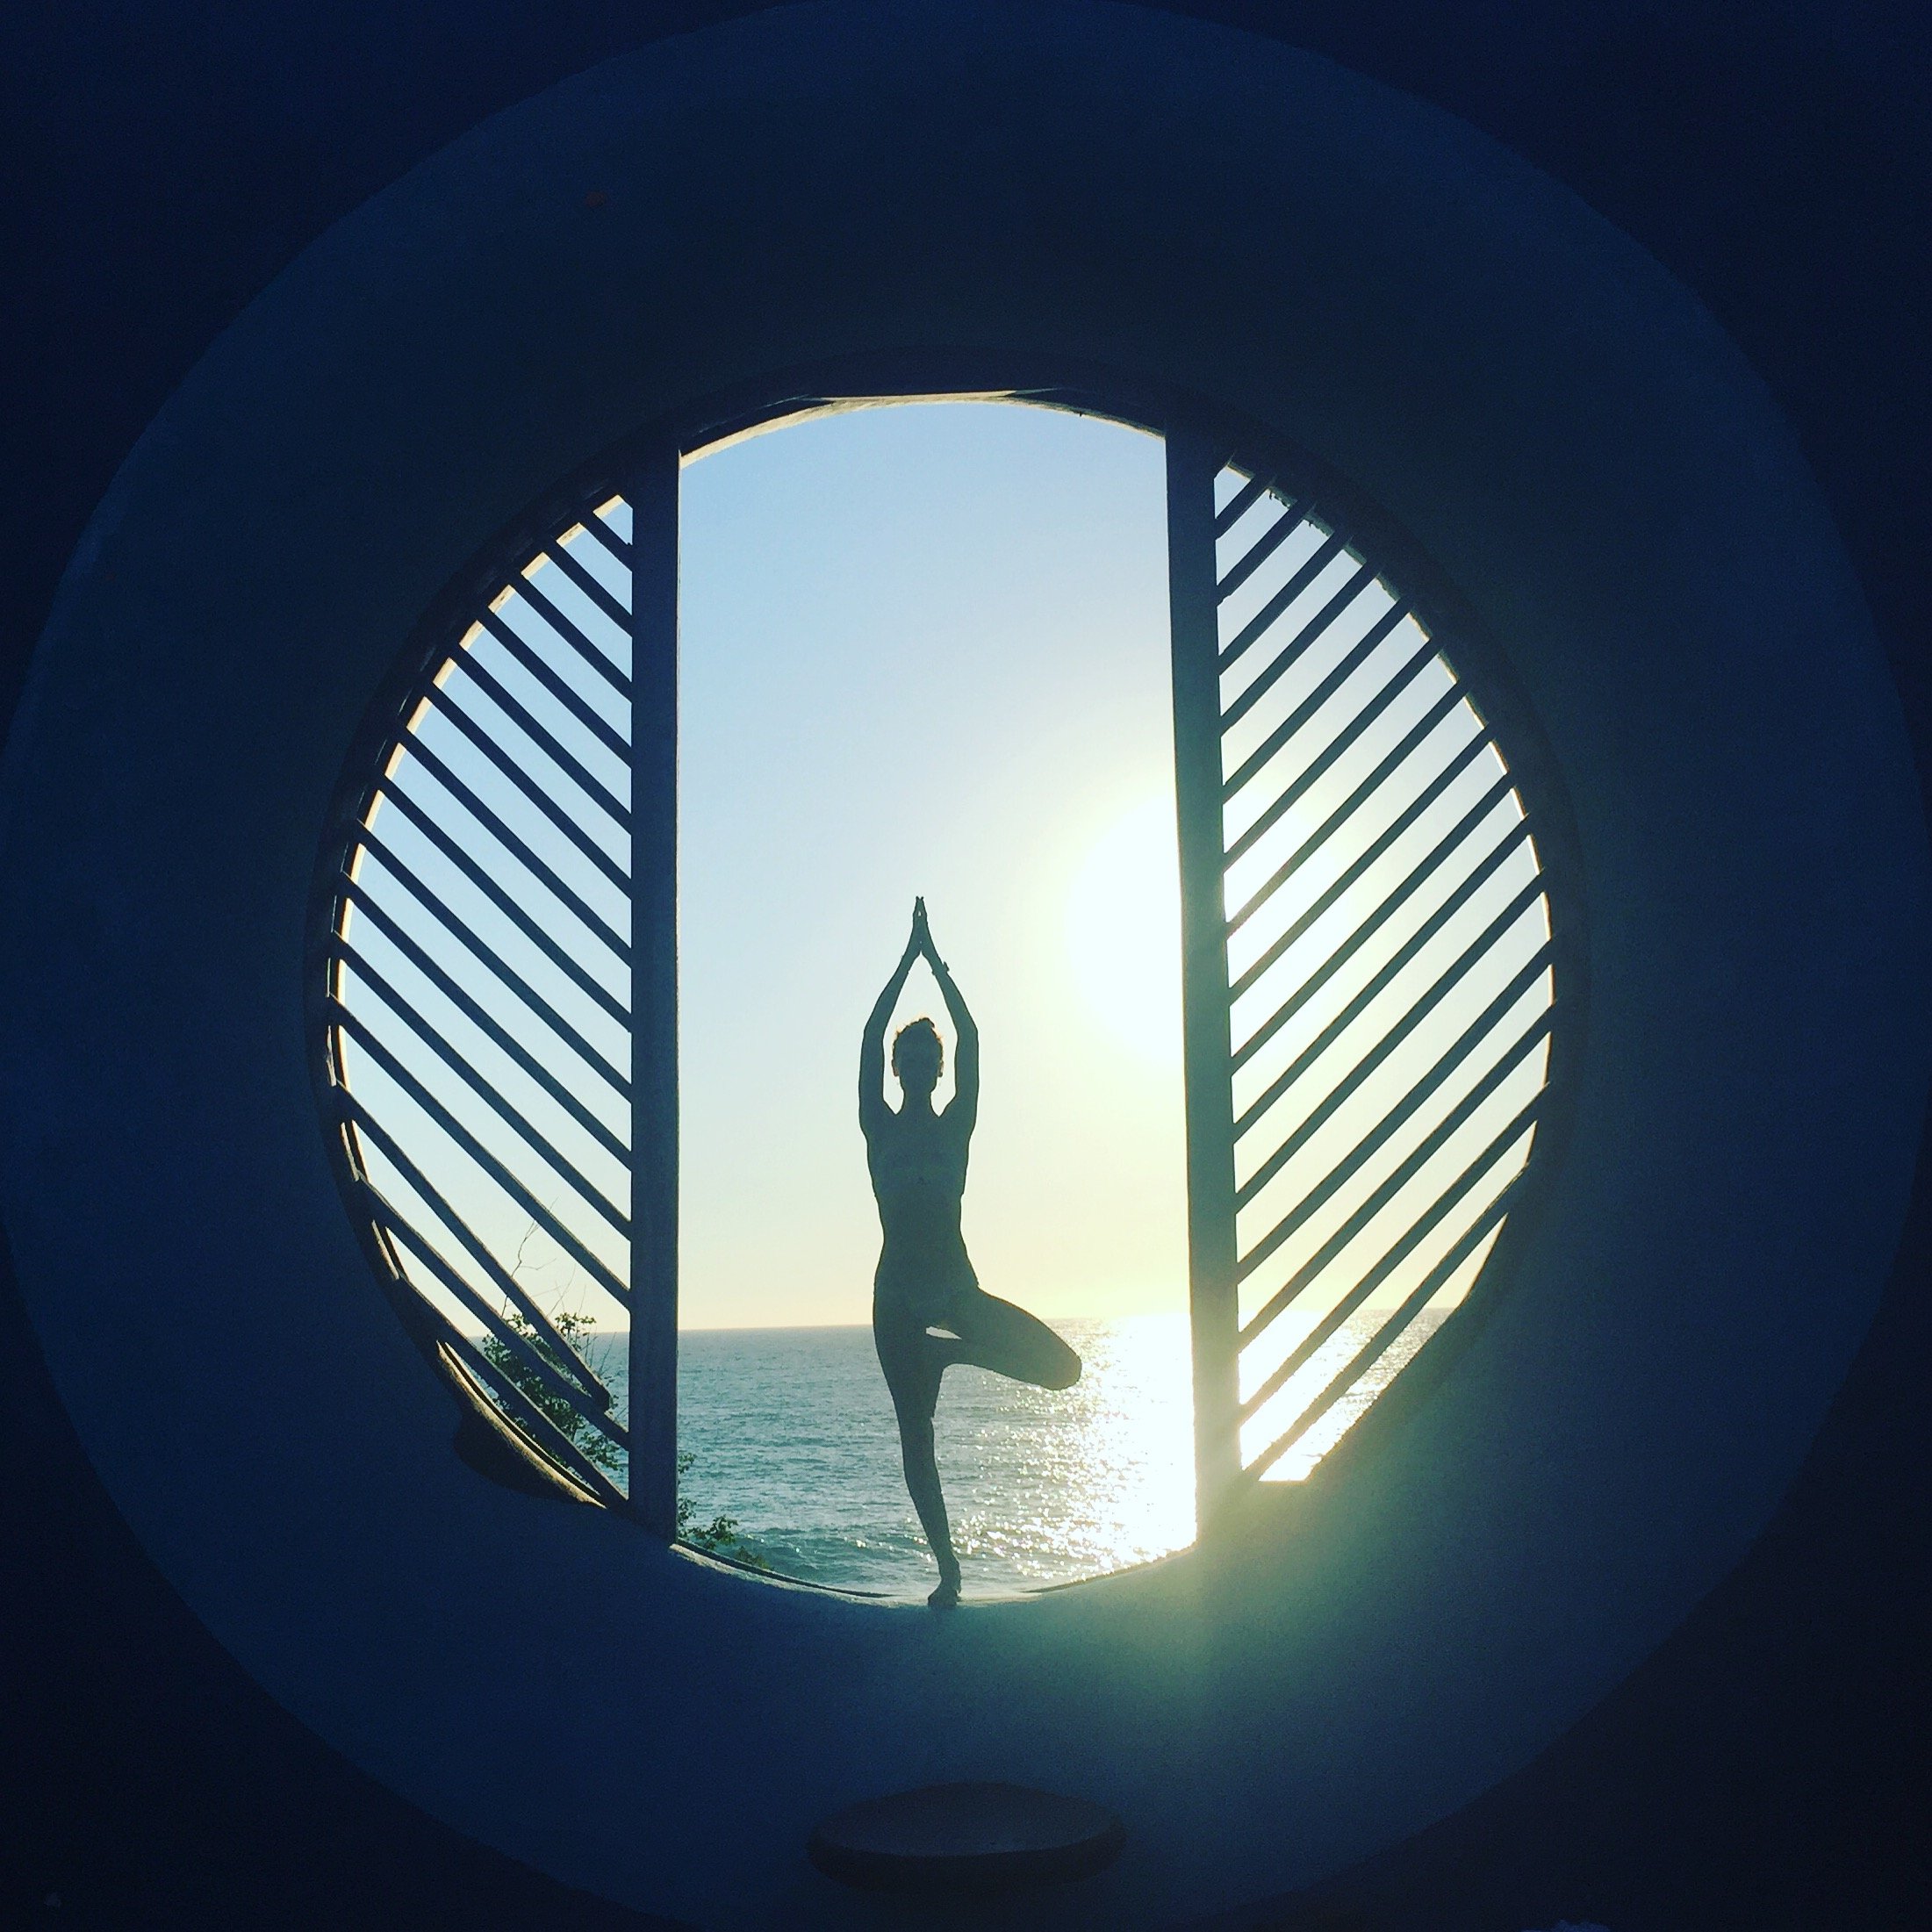
tree pose (vṛkṣāsana)
by Rebecca Richmond
Begin in tāḍāsana (mountain pose). Keeping the feet in a neutral position, transition your weight onto the left foot. If you’re new to the pose, rest the right heel to the inner left ankle, keeping toes to the floor as you bend your right knee. To advance, place the right foot above or below the knee, to the inner left shin or upper, inner thigh. Build stability in tree pose and hug everything towards the mid-line of the body. The position of the pelvis is neutral and both hip points face directly forward. Once your base is well rooted and defined, take your attention to the trunk (torso).
Draw the lower abdominals in and up, as you lengthen your tailbone down. Lift up through both sides of the waist, drawing your lower front ribs in and broadening through the middle back. Release the shoulders down, bring your palms together in prayer in front of the chest, mimicking the action of the legs by pressing the palms together. Lift up through the crown of the head and soften your gaze and jaw. The eye line is straight ahead to the horizon – this is your dṛṣṭi, your focal point of the pose. Breathe deeply as the mind has time to settle. Stand rooted like a glorious tree to the earth.
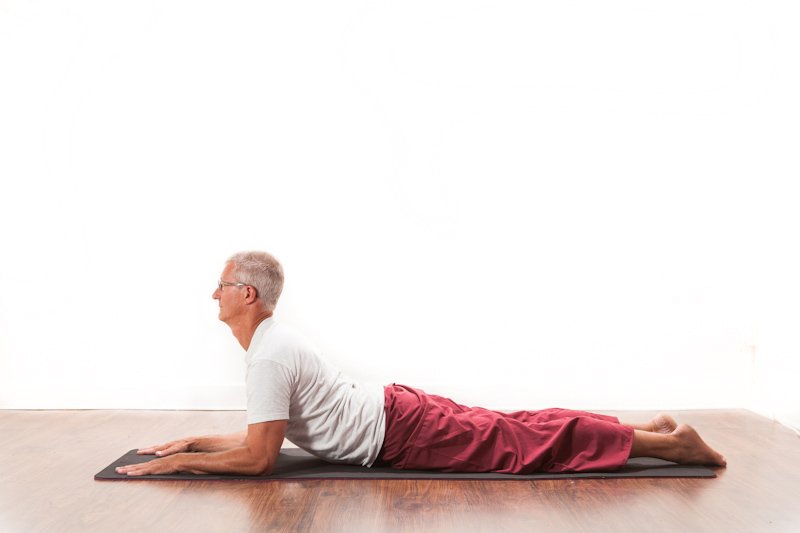
yin yoga’s sphinx pose
by Pagan St Blaize
The sphinx is a very beautiful posture that is accessible to most people. It is a backbend in which there is a slight compression of the lower spine and there is a stretch of the belly and chest. The sphinx increases the blood circulation around the hips and energises the entire system. Many body workers recommend this pose for lumber spine issues and can be very helpful in alleviating lower back pain. You may put a cushion or a blanket under the hips to soften the pose. Strong sensations may be experienced in the lumber spine. This is not dangerous as long as there is no sharp or electric pain associated with the sensation. Your elbows are in line with or just in front of your shoulders to give you firm support — hands gently clasped or in prayer position.
To come into the pose, lie down on your front with your elbows beneath the shoulders. Your upper body lifts while maintaining the forearms on the floor. Relax your gluts and thigh muscles with legs apart if possible. Keep your head lifted and breathe fully and calmly into the pose. Feel the weight of the belly and thighs being supported by the floor. Surrender. Observe your sensations arise and dissolve. Stay in the pose between three to five minutes.
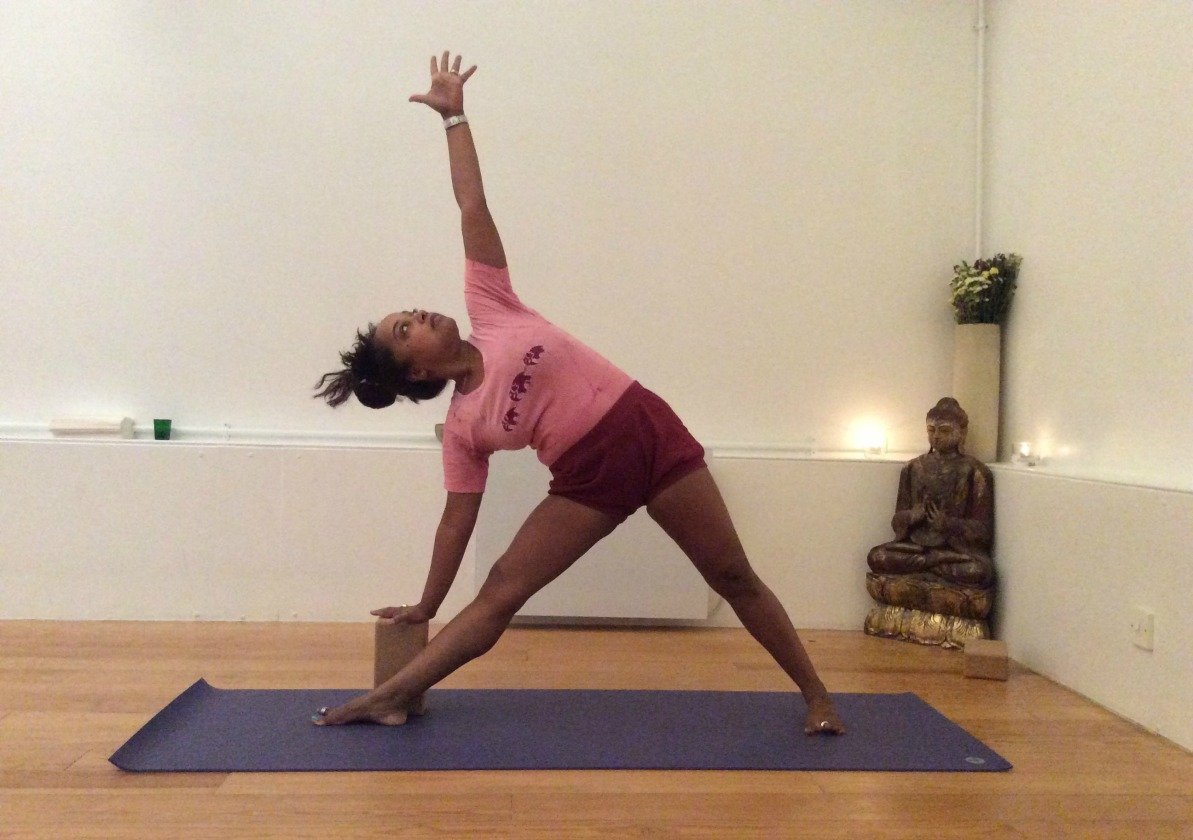
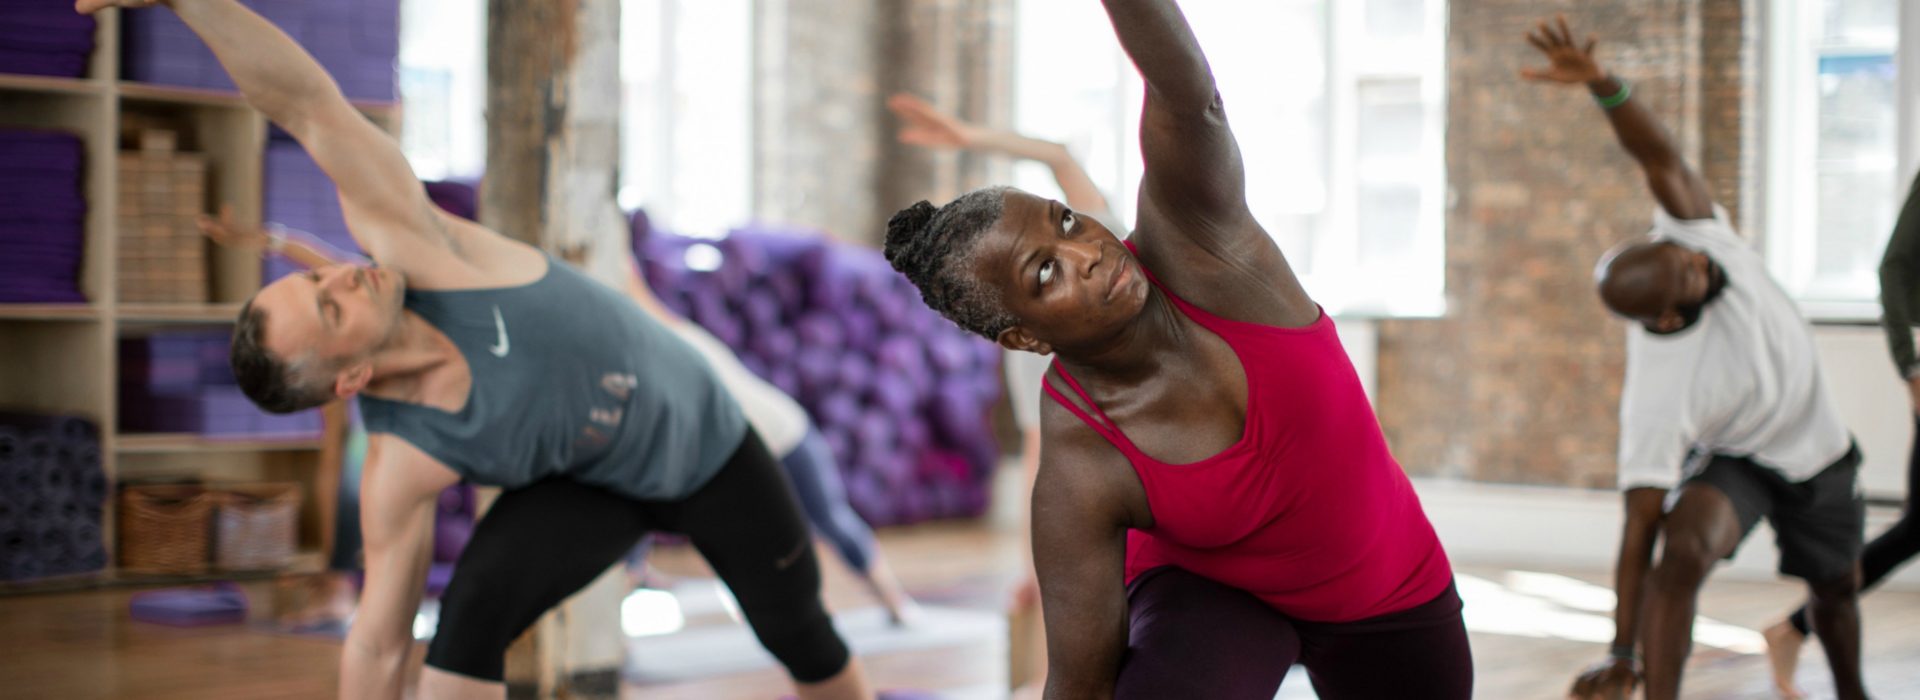
utthita trikoṇasana (triangle pose)
by Harshini Wikramanayake
Jump the legs three and half to four feet apart. Turn the left toes slightly in and the whole of the right foot and leg out to 90 degrees. Observe that the heel of the right foot stays in line with the left arch. You can either jump your arms out with the feet and keep them extended to the side or rest them on your hips while you adjust your feet and legs. Press the outer edge of your left foot down firmly and ensure that your inner heel and big toe of the right foot are firmly pressed down, lift the inner ankles and ensure that the fronts of the thighs on both legs press firmly up and back.
Lift the right arm up and think about extending up and over across the room with that right arm. Exhale to go into the pose. Don’t think about getting the palm to the floor; that will come; but rather extend the right side of the body and the ribs up and over the right hip and place the right hand firmly and rest it on the right shin or ankle. You can use a brick for the right hand. Extend both sides of the trunk evenly in the direction of the head. Re-energise the outer edge of the left foot keep pressing it down firmly and keep lifting the whole inner aspect of the left inner leg (ankle, shin, knee and groin) and lift up and press the front of the left thigh up and back.
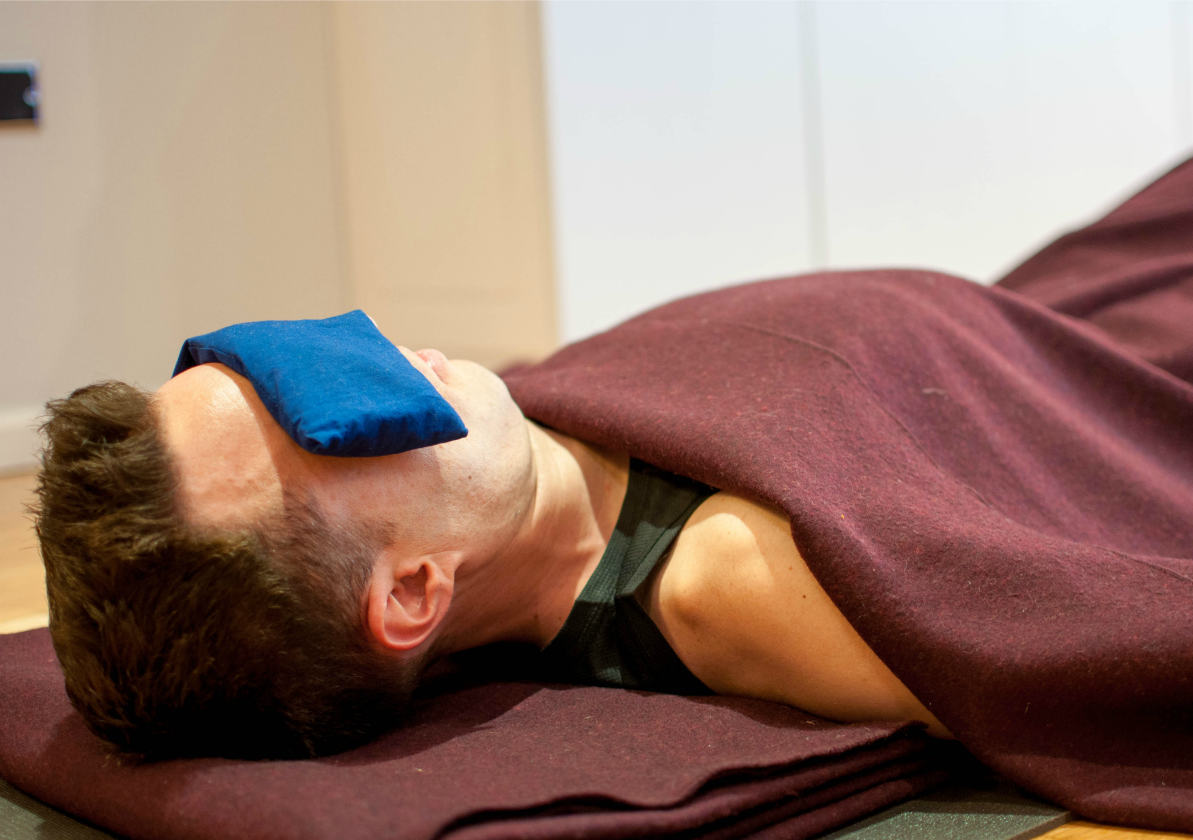
savasana (corpse pose)
by Adam Hocke
For vinyasa flow practitioners, śavāsana can feel like an afterthought; a spare few minutes to let your sweat dry and heart rate slow down. Some of us easily surrender to rest, others twitch and squirm, and the occasional over-tired one lets out low but insistent snores. Śavāsana allows a needed opportunity for muscles to rest, but beyond this its importance is underestimated and misunderstood. One by one, let’s address its mysteries and opportunities.
It is essential that your body feels comfortable, or much like the Princess and the Pea, you’ll notice every little ache, itch, or asymmetry. If your back hurts, place a bolster underneath your knees. If your chin is higher than your forehead, place a blanket underneath your head. Keep warm with a blanket. Cover your eyes with an eye bag to block out light – the slight compression of the eyes with the weight of the bag will stimulate the oculocardiac reflex, which lowers the pulse rate. It may seem a faff to grab the props, but it’s worth it. You need at least five to ten minutes, although in restorative classrooms you may stay in the shape upwards of twenty minutes to experience its full power.
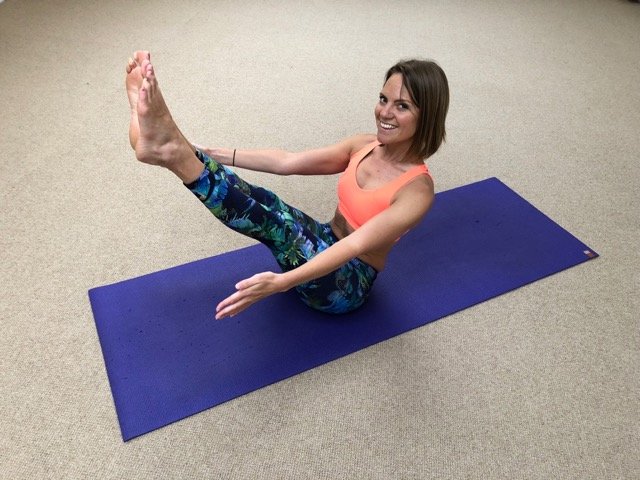
navasana (boat pose)
by Lauren Munday
Nāvāsana comes at the mid-point in the primary series, as we reach the series pinnacle and the most challenging postures. By this point we’re able to access the deep hip opening, spinal flexion, hamstring flexibility, and shoulder rotation required for earlier postures; but in order to properly prepare for what’s to come, in particular kūrmāsana and kūrmāsana, we need sufficient abdominal strength. This is where nāvāsana comes in.
The main action of the posture is hip flexion. Nāvāsana is entered on the inhalation from downward dog (seventh vinyāsā). We lean back on our sitting bones and raise the legs to create a 90-degree angle so the feet are at eye level and the toes are pointed. The arms are held parallel at shoulder height, drawing them back into the shoulder joints with the palms facing each other. The chest is lifted so as not to collapse the lower back and create a sinking boat. The dṛṣṭi is nāsāgre, or the tip of the nose. In order to hold the legs and the pelvis in place, and prevent the spine and chest collapsing, sufficient abdominal and lower back strength is required. Here using the bandhas provides essential support and protection for the lower back.